

|
|
|
| HomeAbout Billiards DigestContact UsArchiveAll About PoolEquipmentOur AdvertisersLinks |
|
Browse Features
Tips & InstructionAsk Jeanette Lee Blogs/Columns Stroke of Genius 30 Over 30 Untold Stories Pool on TV Event Calendar Power Index |
Shoot Straight with Our Fundamentals Checklist
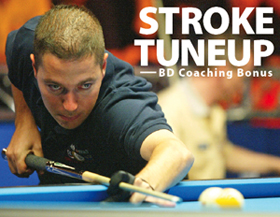
By Dave Alciatore, Ph.D., with Mason King View Part 2: Aiming, Preparation and Execution | Print & Save: Tuneup Checklist & Drills [PDF]
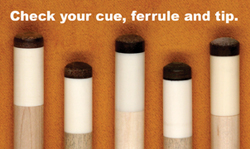
WE ALL love it when we're in the zone - when the stroke is effortless, instinctive and always on the money. But the zone is usually a temporary residence, and it's easy for your stroke to get out of whack for any one of a thousand reasons - if not all 1,000 reasons. Sometimes you have to take your distressed stroke to the practice room and break it down step by step. BD columnist David Alciatore, Ph.D. - known in our online forum as "Dr. Dave' - can help with the diagnosis. On the following pages, we expound on stroke fundamentals catalogued by the doctor to help you identify the steps you might be missing or stumbling over. At the end is a checklist you can clip out and take to the practice room, with a drill for testing your stroke accuracy. One word of advice: One stroke won't fit all. People come in all ages, shapes and sizes, and the most effective stance, grip and practice-stroke routine for your buddy might not be the best for you or your lady friend. The key words are "comfort' and "consistency.' Find a stable, stress-free routine that works, and keep it up on every shot. It'll be easier to identify problems and make future adjustments if you have a constant regimen from the start. Find your flaws, straighten them out, ingrain your new routine, and you'll be back in the zone in no time. Cue and Tip Inspection
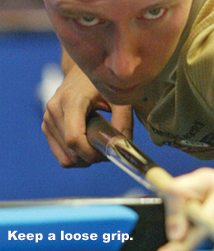
Grip on the Cue
There's much debate about where in the hand to cradle the cue - in the fingers, in the palm, or in that sweet spot in between. There's no single answer. Some hands are big, some are small, some have arthritis. The important thing to grip lightly. Place your grip hand on the cue so that your forearm will be perpendicular (i.e., at a 90-degree angle) to the cue when the tip strikes the cue ball. Assuming that you're using a pendulum stroke, this will ensure that the cue is moving straight forward at impact (not titling up or down) and that your tip placement on the cue ball is as accurate as possible. Hand Bridge
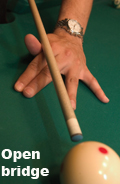
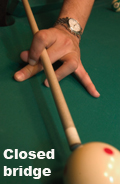
Whether you use an open or closed bridge is a matter of personal preference. I use the open bridge, because I can sight the cue better, and it's easy to form a stable "V' between the thumb and forefinger. Some people prefer the looped-forefinger closed bridge, which provides multiple points of contact for guiding the cue (but can create too much friction if your hand and shaft are sweaty or dirty). There's some debate on bridge length - the distance between the bridge and cue ball. A shorter bridge (4 to 6 inches) may allow more accurate tip placement, and diminish the effects of a back hand that wanders left or right. A longer bridge (8 to 12 inches) allows you to accelerate your stroke more smoothly and build power. Six to 8 inches is good advice for most players and shots. Stance
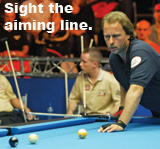
I don't think there is one correct position for your feet. It varies from player to player, depending on comfort level. What matters is to be comfortable, well-balanced and stable, as long as the stick can come forward on the aiming line. And use a consistent stance from shot to shot. Position your head low enough to accurately read the aiming line. I like my head to be as low as possible, like snooker players. But your head and torso positions will depend on what's comfortable for you. View Part 2: Aiming, Preparation and Execution | Print & Save: Tuneup Checklist & Drills [PDF] |
|
Since 1978, Billiards Digest magazine has been the pool world’s best source for news, tournament coverage, player profiles, bold editorials, and advice on how to play pool. Our instructors include superstars Nick Varner and Jeanette Lee. Every issue features the pool accessories and equipment you love — pool cues, pool tables, instruction aids and more. Columnists Mike Shamos and R.A. Dyer examine legends like Willie Mosconi and Minnesota Fats, and dig deep into the histories of pool games like 8-ball, 9-ball and straight pool.
Copyright © 1997 - 2025 Billiards Digest
All Rights Reserved
Luby Publishing, Inc.
310 Busse Highway PBM #319 | Park Ridge, IL 60068
Phone: 312-341-1110 | Fax: 312-341-1469